Handling the fulfillment process and managing your online store simultaneously can be challenging and exhausting. You have to consider various elements to maintain high-quality products and services. Fortunately, Amazon FBA can lift your burdens from doing multiple tasks. How?
Through shipping to Amazon FBA, you can delegate the tedious order fulfillment task to Amazon, letting you focus on your business's marketing aspects and admin tasks. Please look at this article to learn some Amazon FBA Hacks for 2024.
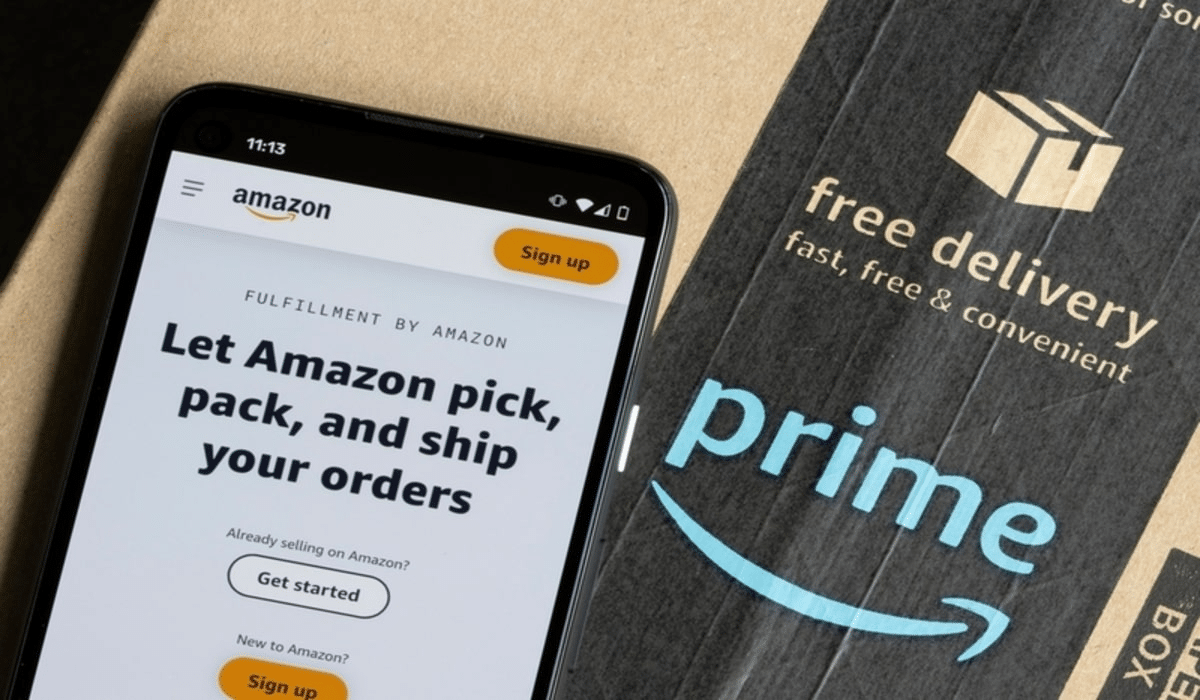
Also known as Fulfillment by Amazon, Amazon FBA is a service that allows businesses to entrust their fulfillment to Amazon. The Amazon seller sends their products to an Amazon fulfillment center, where Amazon will process (pick, pack, and ship) orders when customers make purchases. They also support customer service and complete return processes for those orders.

Every year, the eCommerce industry has become more competitive, meaning you must expand your opportunities and upgrade as much as possible. Amazon FBA helps you focus more on product research, brand development and marketing activities while they handle shipping and customer service.

By learning these Amazon FBA steps, you can maximize the potential of your business. These strategic techniques help you improve sales, increase visibility, and achieve success in the Amazon marketplace.
So, whether you're a seasoned seller or just starting to make a name for your brand, we have included tips for everyone.

Correct product preparation and labelling are vital for smooth and successful Amazon fulfillment center processing. Before you ship products, ensure that each item meets Amazon FBA's packaging requirements, including proper poly-bagging and labelling if necessary.
As you adhere to these requirements, you meet Amazon FBA standards and demonstrate your commitment to professionalism and customer satisfaction. It safeguards your products during shipping and establishes a seamless fulfillment experience and remarkable customer shopping journey.
Pro Tip: Use high-quality, professional-looking packaging to create a good impression on existing and potential customers. Aesthetically appealing and durable packaging enhances the customer's unboxing experience and conveys a sense of trust and credibility in your brand.

Effective inventory management is essential to avoid stockouts of excess inventory. As you track inventory levels and plan restocks using Amazon's FBA inventory data, you can implement a system sales velocity, estimate demand, set up automatic notifications, and know how much inventory you have to keep it at an ideal level.
You can use the Amazon FBA inventory performance dashboard to have a thorough picture of the inventory performance index, helping you to make informed decisions to optimize your inventory management. Furthermore, the FBA inventory management dashboard includes inventory-age tools for managing inventory across various fulfillment centers, allowing you to strategically allocate stock depending on demands, trends, and geographical preferences.
It offers a snapshot to help you fix stranded inventory, identify potential issues, and take corrective actions, maintaining sound inventory health.

Detailed and accurate product listings offer customers the information they need for well-informed buying choices. By including complete and accurate descriptions, specifications, and images, you are helping customers understand what they are purchasing, building trust, and reducing buyer uncertainty.
All qualified FBA listings should maximize the visibility and appeal of your Amazon products. Make an effort to create exciting product listings optimized for Amazon's search algorithm. Conduct extensive keyword research to identify relevant and high-traffic keywords for your product. Incorporate these keywords into your titles, bullet points, descriptions, and backend search terms strategically.
PRO TIP: Use high-quality product images and detailed, compelling content to attract potential buyers.

A well-defined pricing plan enables you to optimize profits. Remember to set the prices to produce enough sales to cover your expenditures and generate healthy profit. Always consider factors such as product costs and overhead expenses.
Proper pricing strategies allow you to balance competitiveness and profitability, maintaining your company's financial viability.
PRO TIP: Price your products competitively to attract buyers and stand out in a crowded marketplace. You can also regularly monitor your competitors' pricing and adjust your prices accordingly. Consider utilizing dynamic pricing tools or Amazon's Automated Pricing feature to automate price adjustments based on market conditions.

The Buy Box is a prominent and highly sought-after Amazon feature on product detail pages, allowing online shoppers to add products to their shopping carts with a single click. It is the primary purchasing option visible to customers when multiple sellers offer the same product on Amazon. Winning the Buy Box gives Amazon sellers a significant advantage, as the majority of customers use the default option to make their purchases.
If you're an Amazon seller of the FBA program, you can win the Buy Box. By leveraging Amazon's fulfillment network, you guarantee fast shipping and provide customer service, contributing to your qualifying for the Buy Box.

Promotions and advertising help Amazon sellers increase their visibility and reach a broader audience. Brands can raise awareness about their brands and offerings by promoting products or services through various channels, such as online ads, social media campaigns, or traditional marketing methods.
Promotions and advertising allow businesses to engage with customers and establish long-term loyalty. Well-planned campaigns can create a sense of excitement and encourage customer participation, whether through contests, giveaways, or interactive experiences. You can establish trust, loyalty, and a solid customer base by encouraging pleasant customer interactions and experiences.
One of the promotions and advertisements you can offer your customers is reducing shipping costs by offering free vouchers. Offering free shipping provides a powerful psychological impact on customers. It eliminates the additional cost barrier and creates a perception of added value.
PRO TIP: Take advantage of Amazon's promotional tools and advertising options to boost your product visibility and sales. Constantly run flash sales, provide coupons, or offer limited-time promotions to incentivize buyers. Also, leverage Amazon's advertising platforms, such as Sponsored Products and Sponsored Brands, to boost product exposure and attract targeted traffic to your listings.

Understanding your Amazon FBA's performance metrics can help you identify areas for improvement and optimization. You can find out potential performance issues and take necessary steps to mitigate the problem. Moreover, you can plan how to improve your overall account health by monitoring factors, including Return Rate, Late Shipment Rate, and Order Defect Rate. It guarantees that you meet Amazon's performance criteria and provide a great selling experience for your customers.
Additionally, performance metrics give information on buyer feedback and customer satisfaction. Monitoring metrics like Customer Reviews helps you gauge the quality of your items and customer service. You can improve your business and overall brand reputation and establish customer loyalty by proactively addressing client concerns, responding to comments positively, and maintaining high levels of customer satisfaction.
PRO TIP: Monitor your seller performance metrics on a regular basis to identify potential opportunities you can take advantage of and issues that you must resolve immediately. Always remember to keep an on your client feedback to know what areas to improve and strive to keep your standards high to preserve a strong seller reputation and prevent potential penalties or account penalties.

When you ship to an Amazon FBA warehouse, you will receive a range of resources and tools to help you optimize your FBA operations when you ship to Amazon. Using resources like the Seller Central dashboard, manage inventory page, and reporting features, you can analyze your business performance and create data-driven decisions. This enables you to maximize operational efficiency, increase productivity, and grow profit.
Moreover, as Amazon has strict standards and guidelines sellers must follow, utilizing its resources lets you know the latest policy changes. You can review Seller University, Seller Forums, and Help page to ensure compliance with Amazon's rules and regulations, decrease the possibility of account suspension or policy infraction, and keeps the selling experience positive.
You can rely on Amazon's trusted customer service with the wide Amazon customer service network in multiple channels, such as Seller Support, phone support, and email assistance. Having these resources lets you seek help managing customer inquiries and overall FBA customer support.

Being an Amazon FBA seller comes with different perks you want to enjoy. This service enables you to effortlessly store, pack, and ship products to your customers while taking advantage of its benefits. Partnering with the Amazon Fulfillment Center US brings you numerous opportunities to develop your business and overall brand.
When you open an Amazon seller account and take advantage of Amazon FBA (Fulfillment by Amazon), you can access an impressive level of flexibility, helping your business in various ways.

You can expect considerable following since Amazon is considered one of the most popular eCommerce platforms worldwide, you can expect a large following. It allows you to reach more potential customers and gain more business exposure for your brand. They can also help establish and spread brand awareness to their users.
Since Amazon operates in multiple countries, each has its own dedicated marketplace. Thus, you can quickly expand your reach beyond Canada when leveraging Amazon FBA shipment. Shipping internationally can be complicated and challenging because of varying regulations, customs processes, and logistical challenges. But an FBA shipment allows you to benefit from Amazon's international shipping and customs expertise.

It is challenging to go around and work at your most convenient time if you are doing everything for your business. If you want a smooth business flow, you need a fixed schedule to follow. But as an Amazon FBA seller, you can work anywhere and whenever you want.
While having an Amazon seller account is already a benefit in itself, Amazon FBA elevates your business by allowing you to ship inventory in their advanced fulfillment centers. This relieves you of the burden of managing your storage space, letting you focus on other essential aspects of your business.

All products under FBA shipments are eligible for Amazon Prime shipping, offering free and fast shipping to millions of Prime members. As your business grows, the Prime badge on your listings helps attract more customers, resulting in higher sales volumes and market visibility.
Furthermore, Amazon FBA handles the entire order fulfillment process of every FBA shipment, from packing to shipping and customer service. This automation enables you to scale your business without adding additional crew or resources. Amazon's fulfillment centers have the technology and expertise to ensure that the FBA shipment is processed efficiently and accurately, even as your sales volumes increase.

One of the most significant advantages of the FBA program is the quick Amazon Prime shipping of your products. Online shoppers purchasing your FBA products can use Amazon's two-day shipping benefit. A prime badge on your product listing may improve conversions by up to 30%.
When shoppers purchase multiple products from different sellers, Amazon can consolidate all FBA shipments into one. This process helps reduce shipping costs and allows faster delivery since all items are shipped together. Amazon FBA's specialized services speed up delivery by optimizing shipping routes and lowering the number of individual shipments.
Amazon FBA collaborates directly with every primary shipping carrier, including UPS, FedEx, and USPS, ensuring reliable and timely delivery. The Amazon-partnered carrier improves the overall efficiency and dependability of Amazon FBA's delivery services.

Managing a business 24/7 can deteriorate your body in an instant. However, this is what you get with Amazon FBA. While you sleep or work on something else, orders and fulfillment all continue. It means you can give yourself me-time, and it won't hurt your business operations!
Additionally, the Seller Central platform is accessible 24/7, which means sellers can monitor and the manage inventory page, product listings, pricing, promotions, and other business aspects anytime.

Your customers (both existing and potential) can get customer service around the clock. Customers can, for instance, track packages, check the delivery status of their orders, and return the products without contacting you.
Amazon provides customer services and support to you and your customers 24/7. Customers can contact Amazon's customer support team anytime with any order problems. On the other hand, you can also reach out to customer service if you have questions about the tools and other Amazon FBA features.

When a shopper buys your products on Amazon, Amazon collects the sales proceeds on your behalf, including the product price and any applicable shipping costs. These funds are held until payment disbursement occurs.
Amazon offers several payment ways for sellers to receive their payments, allowing sellers to choose their preferred payment method based on their location and personal preference.
Amazon provides a regular payment schedule for any of its sellers, so you don't have to wonder when's the next payment. Sellers are paid for the previous two weeks' sales every two weeks (bi-weekly), also known as Settlement Periods. You can depend on consistent payments to keep your business's cash flow healthy.

Take advantage of the FBA inventory management tool by using historical sales data, seasonal trends, and market research to forecast product demands.
Moreover, continuously evaluate the performance of your products and identify any signs of declining demand or saturation. If product sales decline, think of implementing strategies such as pricing adjustments, marketing campaigns, or product variations to lengthen its life cycle or transition to new items with better potential.
Before having an Amazon FBA business, you must have an Amazon Seller Central Account. You can easily set this up on Amazon's website and choose to be an individual seller or a professional one.
While the individual account does not have to pay a monthly subscription fee, Amazon will charge you $0.99 per sale. On the other hand, a professional account will cost you a monthly subscription fee of $39.99. However, no fees will be charged in the first month. This account does not come with other extra costs.
Once you're done setting up your Amazon selling account, you can add FBA to it. Then, visit Amazon Seller Central and click under the inventory drop-down menu. Choose the Create a New Product Listing and the product category you will sell. Fill in the necessary information, and remember to have your Universal Product Code (UPC) ready before creating a product listing. Lastly, click Save and Finish.
After finishing the product listing, you can prepare your products for delivery to Amazon's warehouses. Keep in mind to pack and label the products correctly to keep their safety. On this note, you can partner with a shipping provider, like Stallion Express, to bring the items to the Amazon FBA warehouse.
You can check this article to see how much the Amazon FBA fees are and which shipping plan works best for you.
The Amazon FBA costs vary on several factors, including the product size and weight, storage duration, and other optional services you choose to utilize. Some key components that contribute to the cost of using Amazon FBA:
Fulfillment Fees. These charges cover the costs of picking, packing, and shipping your products to customers. Fulfillment fees are based on the package dimensions and weight and vary according to the product category. Amazon offers a charge schedule outlining the particular rates for various product categories and sizes.
Storage Fees. Amazon charges storage fees for storing your items in their Amazon fulfillment centers. These fees are assessed every month and are computed based on the volume (cubic feet) of your inventory. Storage fees vary depending on the peak or off-season and whether your things are standard-size or oversize.
Long-Term Storage Fees. Long-term storage costs may apply if your products remain in Amazon's fulfillment centers for a prolonged time. These fees are additional charges and are charged semi-annually for items held for six months or longer.
The average charge for standard-size packages stored in Amazon warehouses from January to September is USD 0.75/cubic foot. If you are storing oversized items in the same period, an additional USD 0.48/cubic foot fee applies.
If you store items during the holiday season (October-December), a USD 2.40/cubic foot storage fee for standard-size and an additional USD 1.20 fee applies for oversized goods.
Removal or Disposal Fees. You must pay the associated fees if you remove or dispose of inventory from Amazon's fulfillment centers. When you request to have the items returned to you, removal fees apply. Meanwhile, disposal fees apply if you opt to have unsold inventory disposed of by Amazon.
Optional Services. Amazon provides optional services at an additional cost. For example, if you want Amazon to prepare and label your products, there may be fees connected with it. Other optional services include Amazon's FBA Export program for international shipping or the FBA Small and Light program for small and lightweight products.

As mentioned, you can work with Stallion Express to securely bring your items to the Amazon US warehouse when shipping to Amazon FBA. They offer the simplest Amazon FBA shipping process at the cheapest shipping cost. However, you can only benefit from this if you have a Stallion account. So, remember to make one!
-The first thing you must do is attach the shipping label from Amazon Seller Central.
-Then, go to your Stallion dashboard, input your tracking number, print, pay, and attach the QR code label from Stallion Express.
-If the goods are ready for shipping, you can drop off the parcels at any Stallion branch across Ontario or schedule a pickup service.
-Stallion processes customs clearance, and United Parcel Service (UPS) will pick up your shipment.
-UPS completes the final delivery to the Amazon FBA warehouse.
You can save as much as 87% on shipping rates compared to the standard carrier when shipping to the US. For example, sending a 30" square box weighing 30 lbs (13.60 kg) to Newark, California from Canada can cost as low as CAD 20.00. That's 7x cheaper than shipping than the standard carrier.
When it comes to shipping products to the Amazon US warehouses for Amazon FBA shipping, Stallion Express stands out as the most reliable, efficient and affordable option. We are committed to providing exceptional service by prioritizing seamless goods transportation and ensuring the inventory arrives at their designated Amazon warehouse on schedule and in pristine condition.
Our extensive experience in cross-border shipping and logistics allows us to effortlessly complete complicated shipping processes and customs requirements. If you are shipping to Amazon's US warehouses from Canada, we've got you covered.
We have a dedicated and readily available customer support team to address any customer inquiries or concerns, providing tailored assistance throughout the shipping process.
Make the transport process seamless and affordable by working with Stallion Express. You may contact our customer service at +1 877-863-7447 or visit our website.
Now, with all this information, you might have the question -
Yes, Amazon FBA can be worth it for many entrepreneurs and business owners. It offers access to a large customer base (61% of US consumers start their product search on Amazon), convenient customer service, payments and inventory management.
With FBA, Amazon frees up a lot of your time for other business tasks. However, there are fees and high competition to consider.
Also, note that you will be giving up some control over the packaging and shipping process. This may or may not be ideal for your business considering costs and branding vision.
Many of our customers prefer launching their products on Shopify or Etsy for a variety of reasons, including higher control. We highly recommend weighing all factors and estimating profitability per platform for your product. You can also consider selling the same product on multiple platforms.
Aman looks after the content marketing department at Stallion Express. He is passionate about helping businesses grow by providing informative and up-to-date trends in the eCommerce industry. Outside the office, you can find him on the soccer field cheering on Real Madrid.


Can our fellow Torontonians relate?
-
#smallbusiness #business #entrepreneur #socialmedia #shipping #ecommerce #canadianecommerce #shopify #poshmark #b2b #saas #etsy #ebay #canada #canadiansmallbusiness #shoplocalcanada #entrepreneur
#toronto

Here’s your quick hassle free shipping from 🇨🇦 to 🇺🇸 as a business owner!
-
Any questions?! Leave them 👇🏻 and save this video so you don’t forget!
-
#smallbusiness #business #entrepreneur #socialmedia #shipping #ecommerce #canadianecommerce #shopify #poshmark #b2b #saas #etsy #ebay #canada #canadiansmallbusiness #shoplocalcanada #entrepreneur

Meet @drinkbenny a 🇨🇦 female founded energy drink brand! Instead of focusing on their products, they’re taking a unique approach by hosting in person events in different Canadian cities to offer an experience for their community 🧡
-
What are your thoughts on in person events? 💭
-
#smallbusiness #business #entrepreneur #socialmedia #shipping #ecommerce #canadianecommerce #shopify #poshmark #b2b #saas #etsy #ebay #canada #canadiansmallbusiness #shoplocalcanada #entrepreneur

Do you know the difference between DDU and DDP when shipping internationally 🌏 ?
-
Questions? Leave them below! 👇🏻
-
#smallbusiness #business #entrepreneur #socialmedia #shipping #ecommerce #canadianecommerce #shopify #poshmark #b2b #saas #etsy #ebay #canada #canadiansmallbusiness #shoplocalcanada #entrepreneur

Here’s a quick hack to save time from choosing multiple postage options
↪️ Turn on the lowest postage rate automation to save you time!
-
Questions? Leave them below! 👇🏻
-
#smallbusiness #business #entrepreneur #socialmedia #shipping #ecommerce #canadianecommerce #shopify #poshmark #b2b #saas #etsy #ebay #canada #canadiansmallbusiness #shoplocalcanada #entrepreneur
